
How to Start a Shopify Store in 2026 (Step-by-Step Guide)
Start Your Shopify Store for €1/month (2026 Method)
No experience needed.
No coding.
No big budget.
Launch your first online store today.
This guide is for you if
• You want to start dropshipping
• You want passive income online
• You want to build a brand
• You want to earn online in 2026
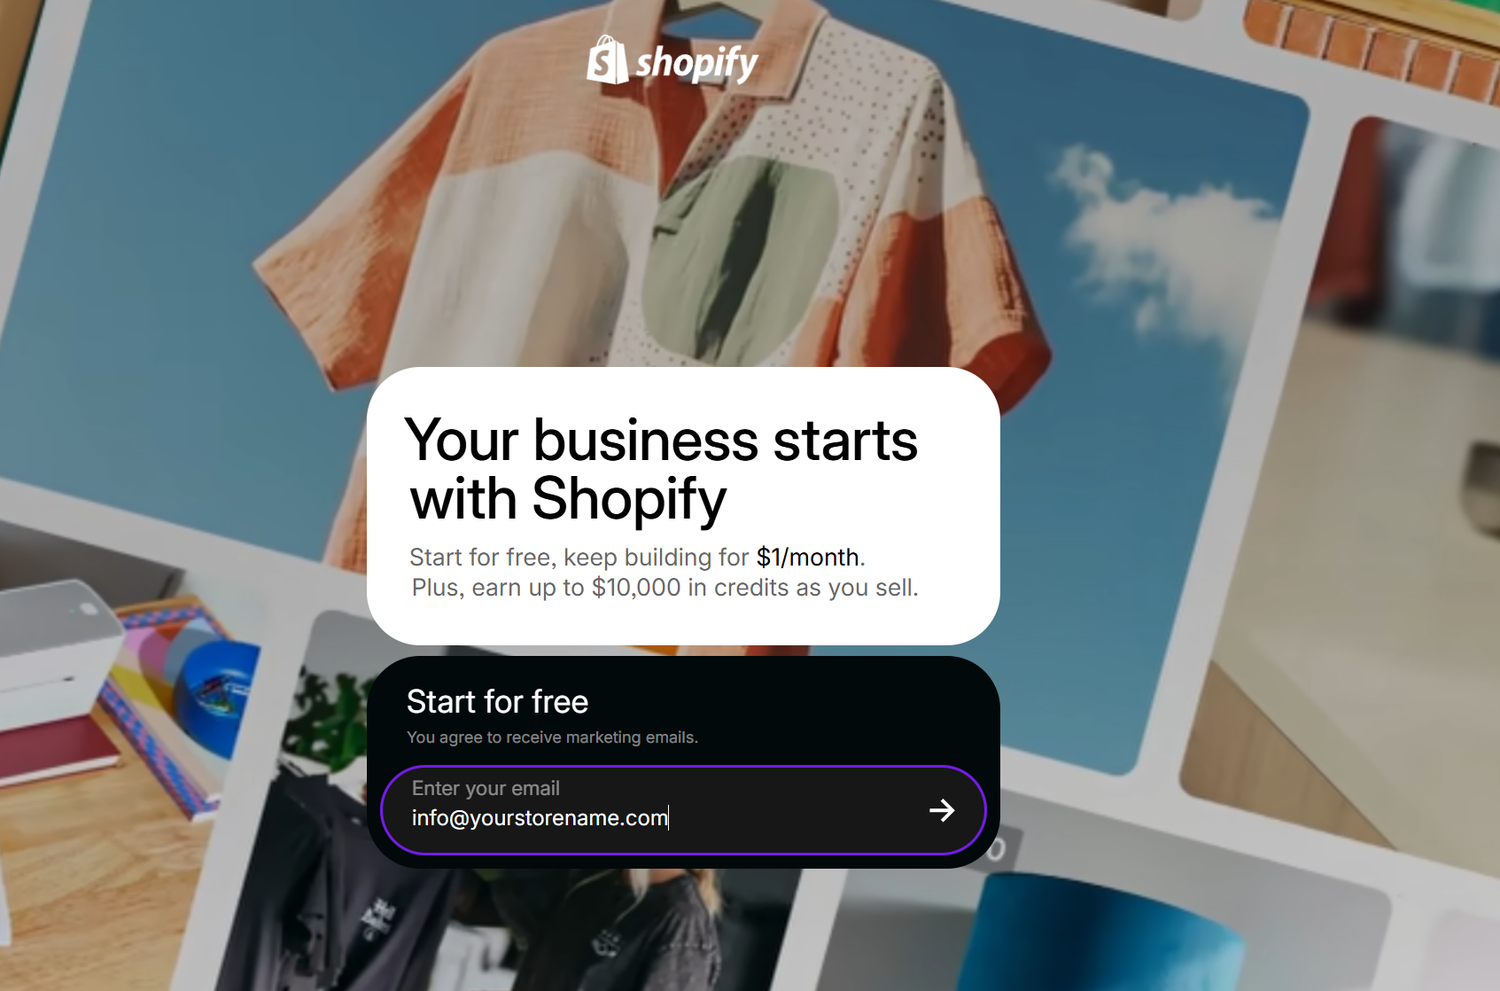
Step 1 — Create Your Shopify Account
Click the button below and open your store. You’ll be able to test everything before fully committing, and right now Shopify offers an extremely low starting price.
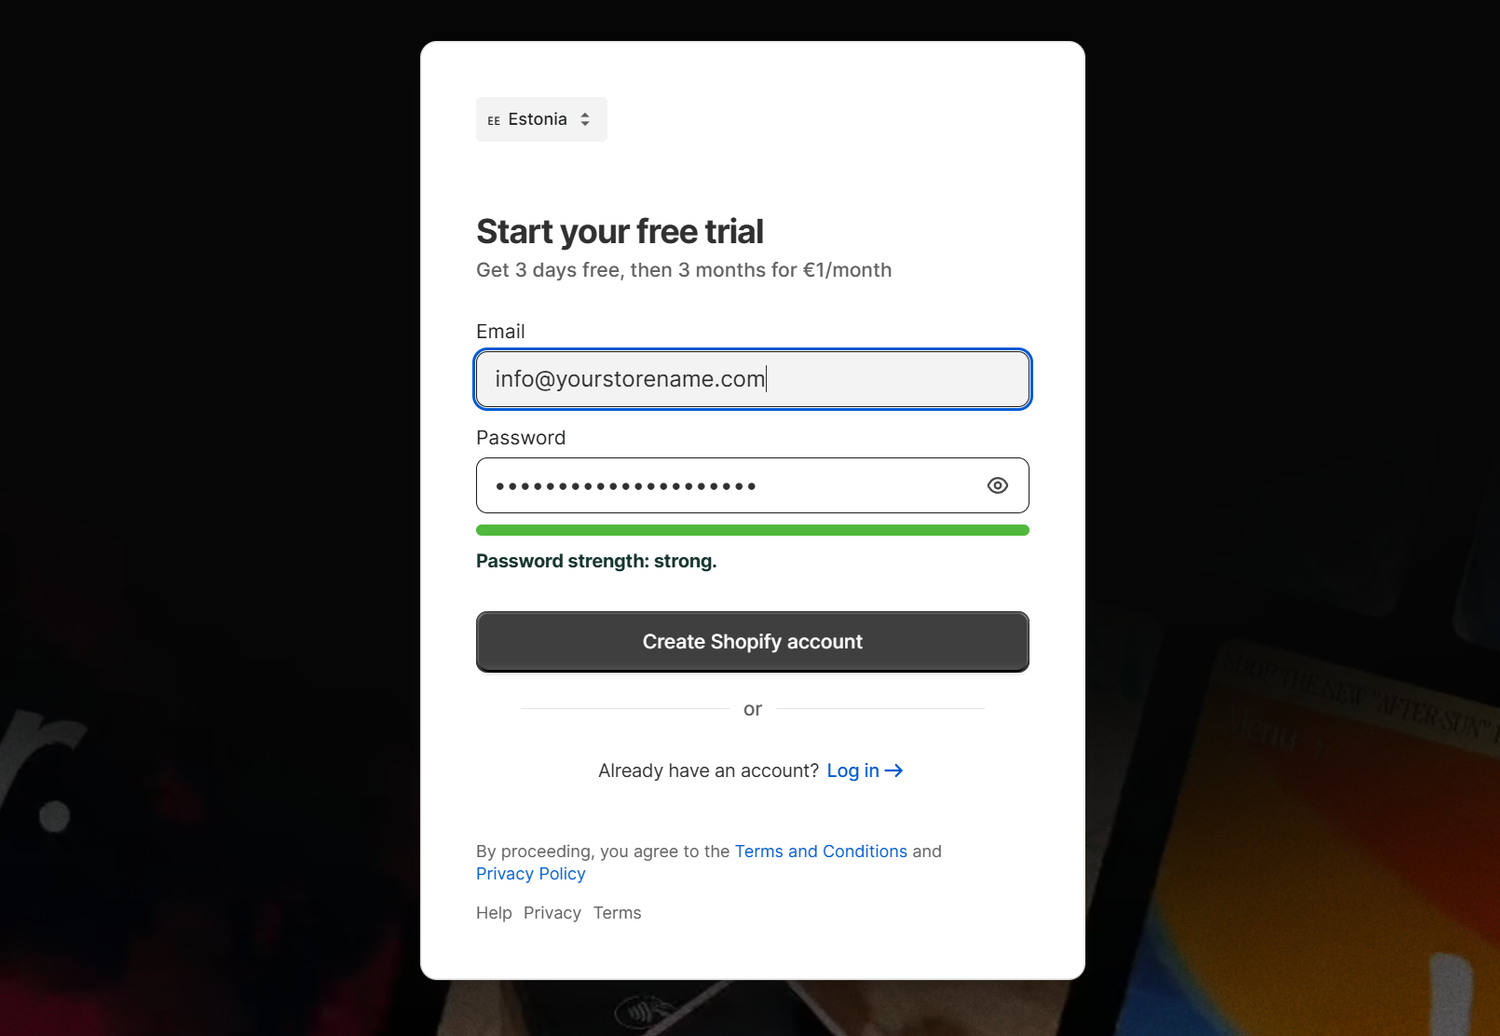
Once you click, you’ll be asked to enter:
- Your email address
- A password
- Your store name
Don’t worry too much about the name you can change it later.
After signing up, you’ll be taken directly to your Shopify dashboard. This is where you manage everything: products, orders, design, and payments.
Why this step matters:
Your Shopify account is the foundation of your online business. Once it’s created, your store already exists now you just need to customize it.
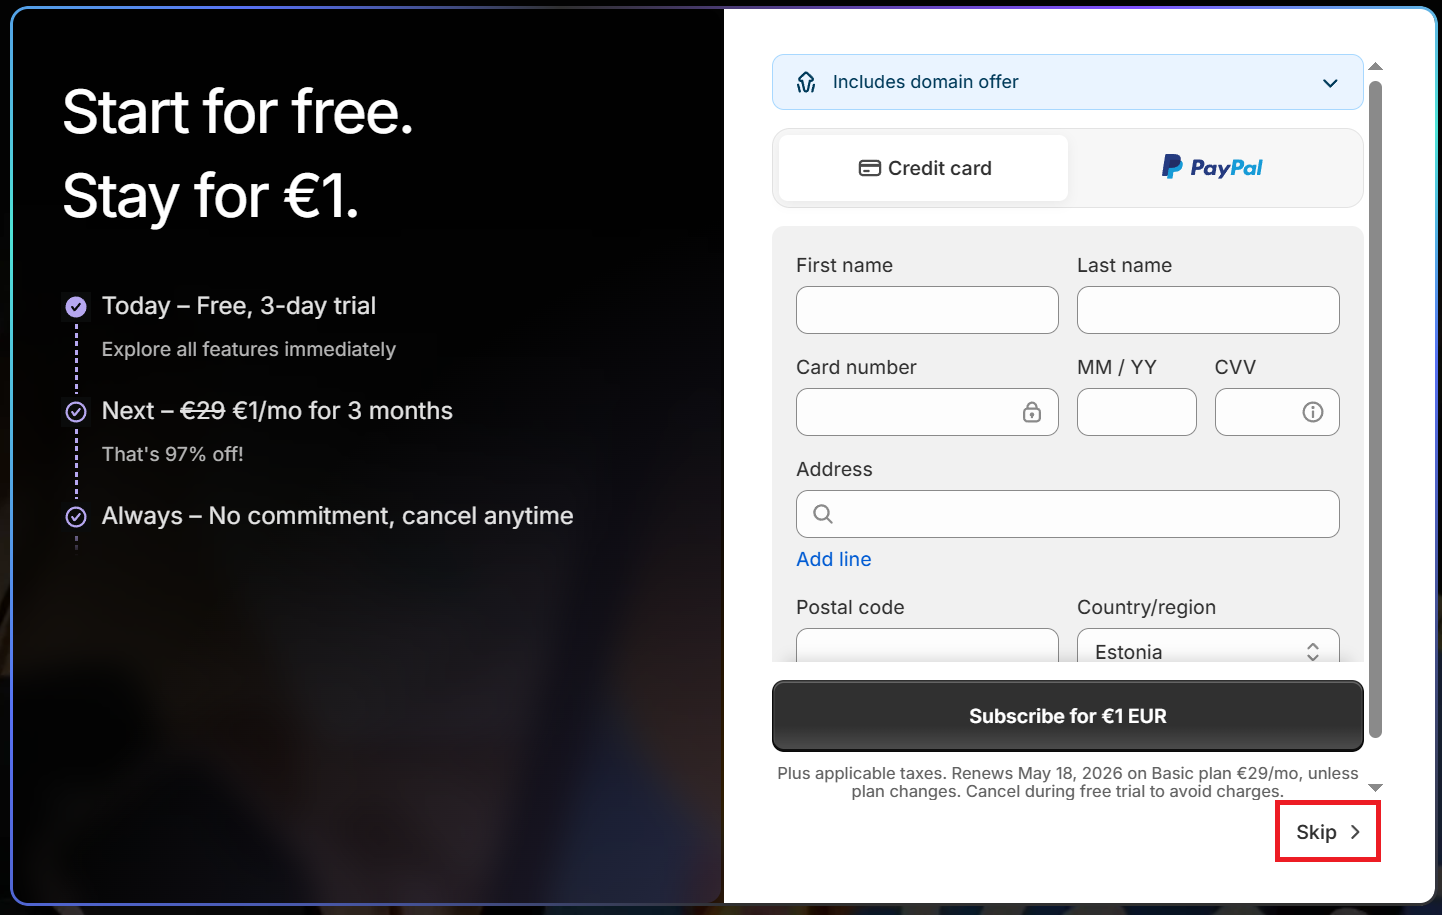
Step 2 — Choosing a Plan (You Can Skip This for Now)
After creating your Shopify account, you may be asked to choose a subscription plan.
Don’t worry! you do not have to select a paid plan immediately.
Shopify gives you a free trial period (usually around 3 days), which allows you to:
- Explore the dashboard
- Design your store
- Add products
- Test everything
You can simply click “Skip” and continue setting up your store first.
Later, when you're ready to launch or start selling, you can choose the most suitable plan for your business.
If you already know you want to start selling immediately, you can also select a plan right away and continue without interruptions.
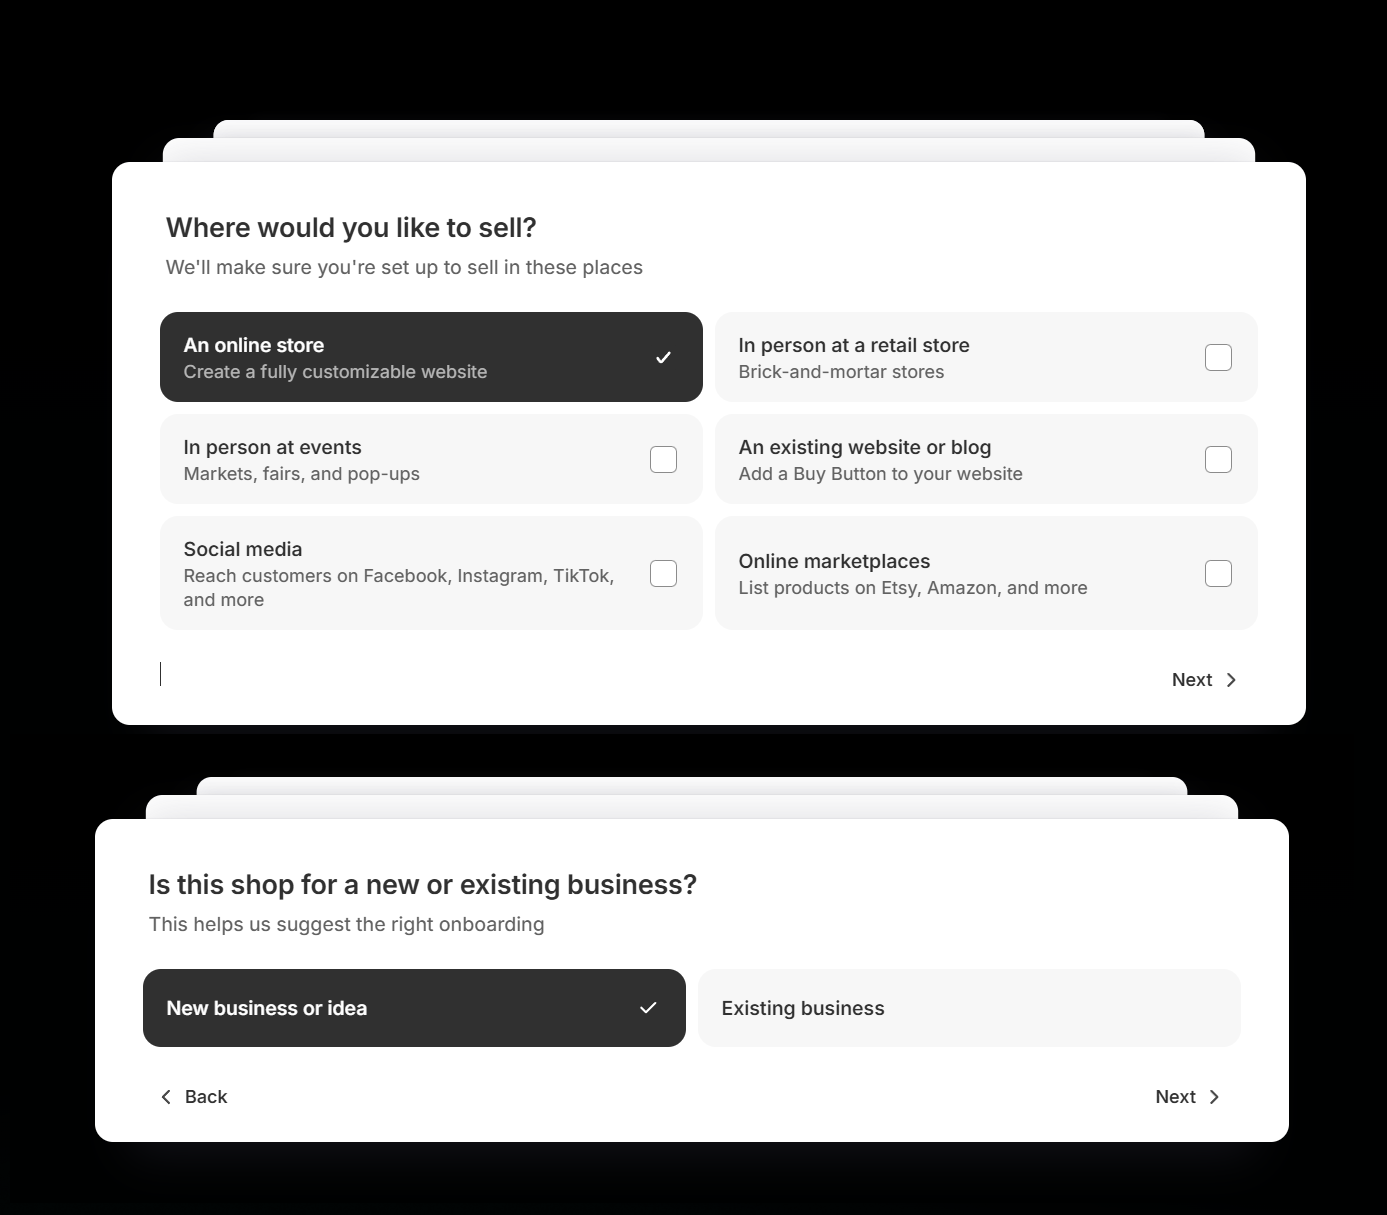
Business Setup Questions
Before you reach your Shopify dashboard, Shopify will ask a couple of quick questions:
- Where would you like to sell?
Options include Online, Social Media, or in-person.
For beginners, choose Online — you can always add other channels later. - Is this store new or is it already an existing business?
Choose New store if you are starting fresh.
If you already have a business, select Existing store.
Don’t worry if you’re unsure you can adjust this later in settings.
Why this matters:
These questions help Shopify tailor your store setup and features. Answering honestly ensures your store is configured correctly for your situation.
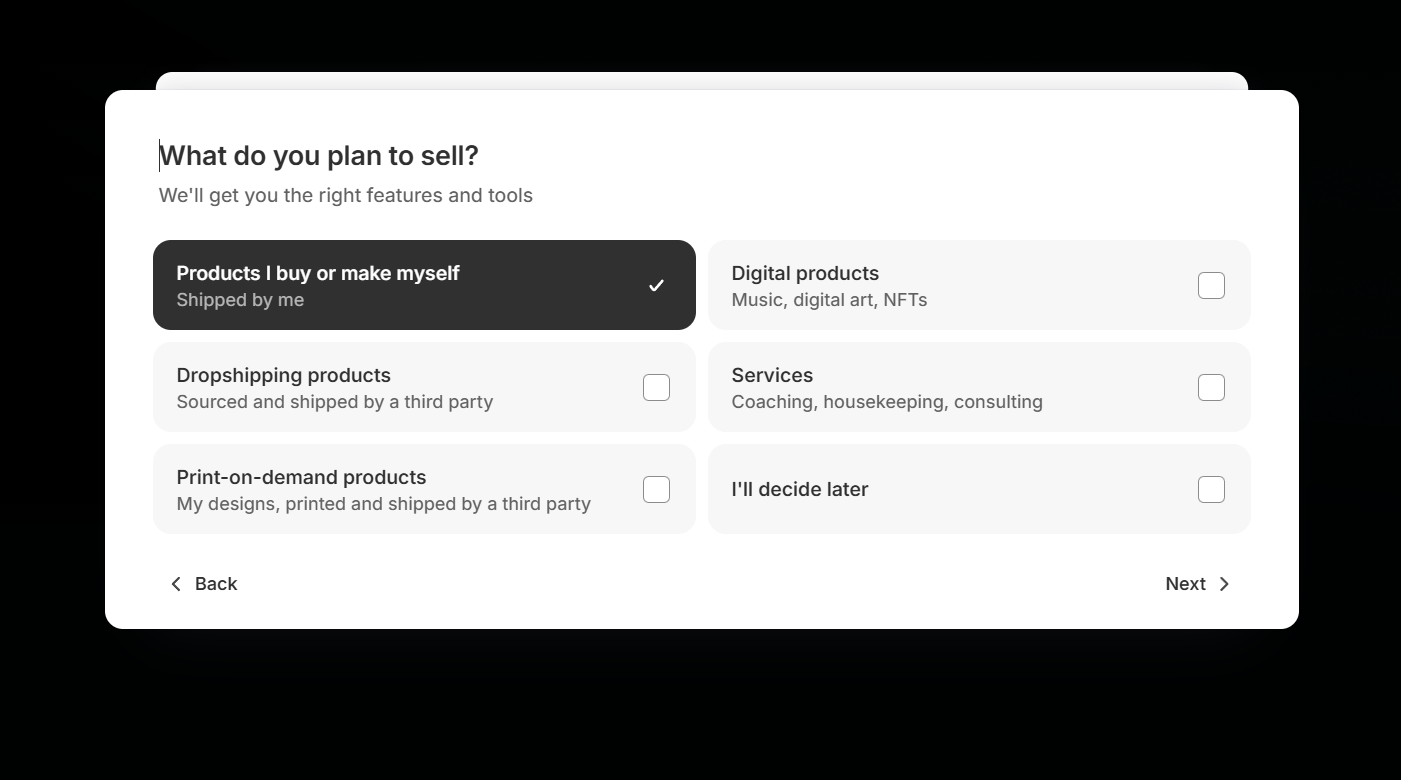
Step 3 — What Do You Plan to Sell?
Shopify will ask: “What do you plan to sell?”
This helps the platform suggest the right features, apps, and tools for your store. Here’s what each option means:
- Products I buy or make myself — Shipped by me
Use this if you have your own products and will handle shipping. - Digital products — Music, digital art, NFTs
For downloadable items, software, or digital art. No shipping needed. - Dropshipping products — Sourced and shipped by a third party
If you plan to sell products from suppliers who ship directly to your customers. - Services Coaching, consulting, or other services
If you offer services instead of physical products. - Print-on-demand products — My designs, printed and shipped by a third party
For custom merchandise like T-shirts, mugs, or posters printed and fulfilled by a provider. - I’ll decide later
Perfect for beginners who just want to explore Shopify first.
You can fully set up your store, add products later, and still use your trial.
Why this matters:
Answering helps Shopify configure your dashboard and recommend relevant apps, but it’s not permanent. Beginners can safely skip or choose “I’ll decide later” to continue building their store.
Ready to start?
Some store owners make their first sales within days.
Others build full-time income streams.
But none of them started without opening their store first.
Open your Shopify store in 2 minutes.
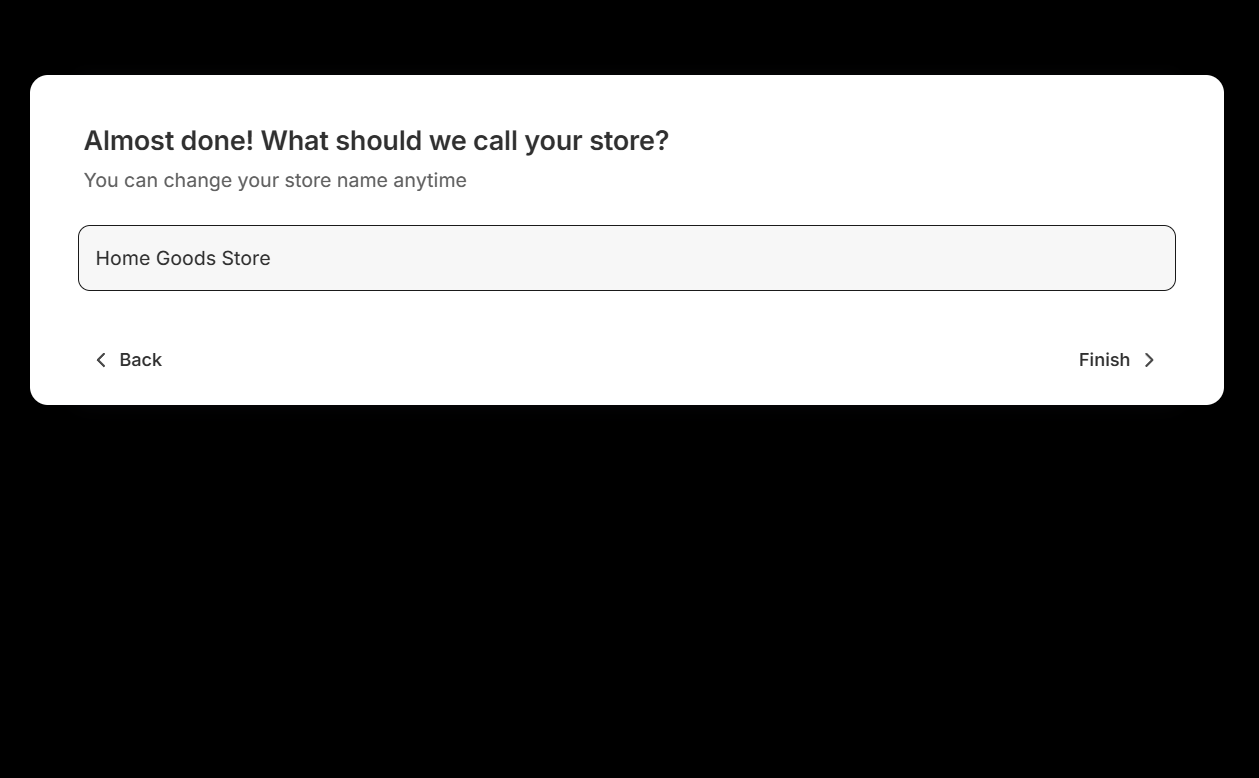
Step 4 — Choose Your Store Name
Choose the shop or Brand name, you can allways change it later, and click Finish
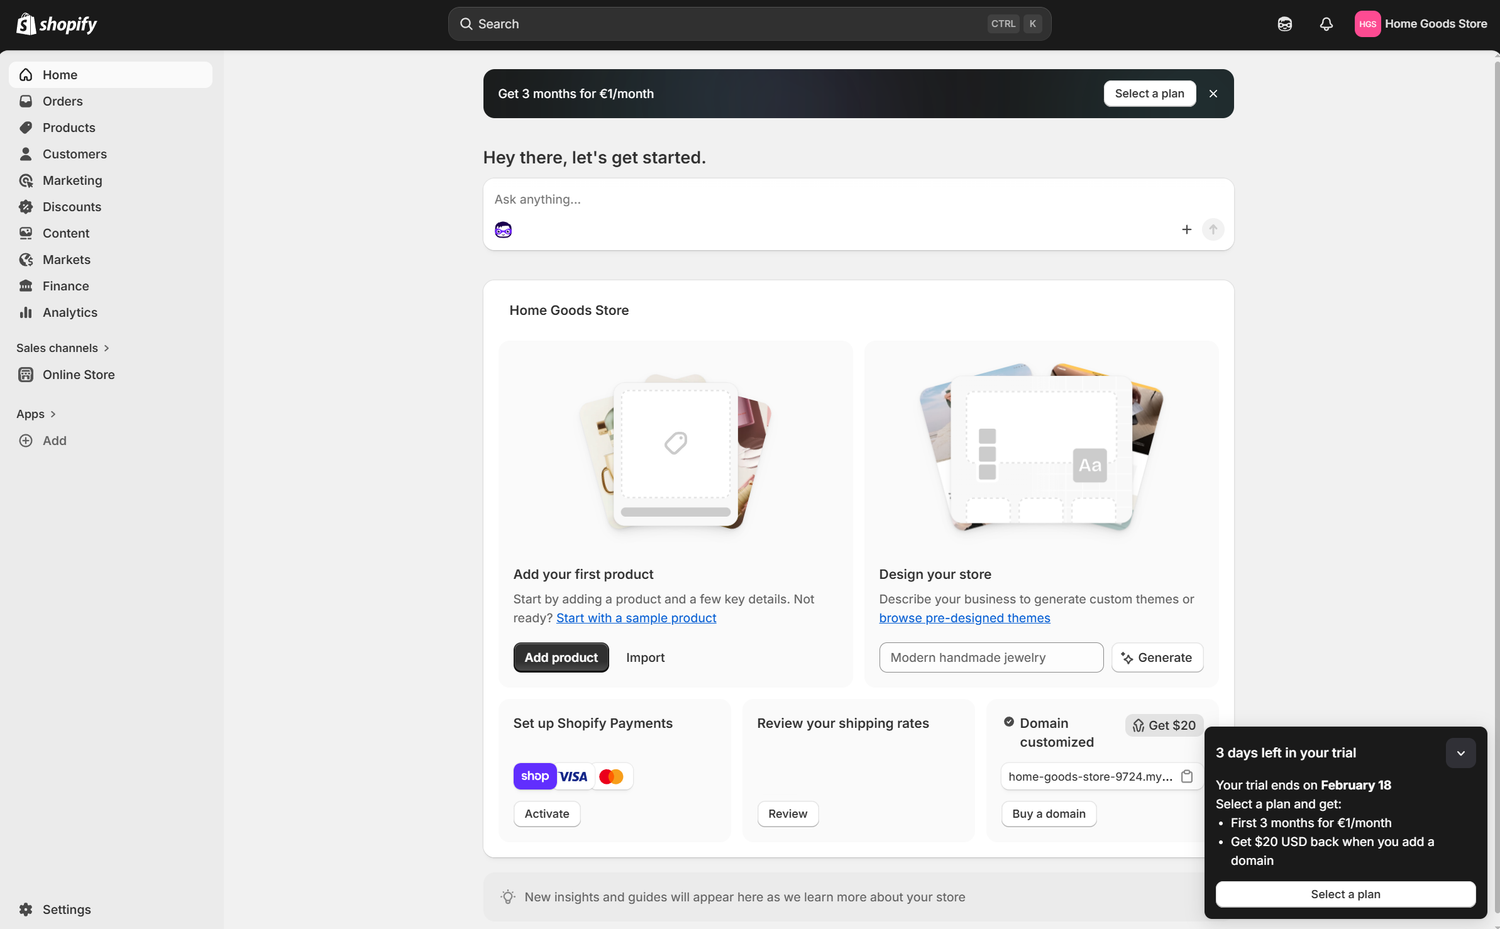
Welcome to the Shopify Dashboard
Here you see your new main home, the shopify dashboard.
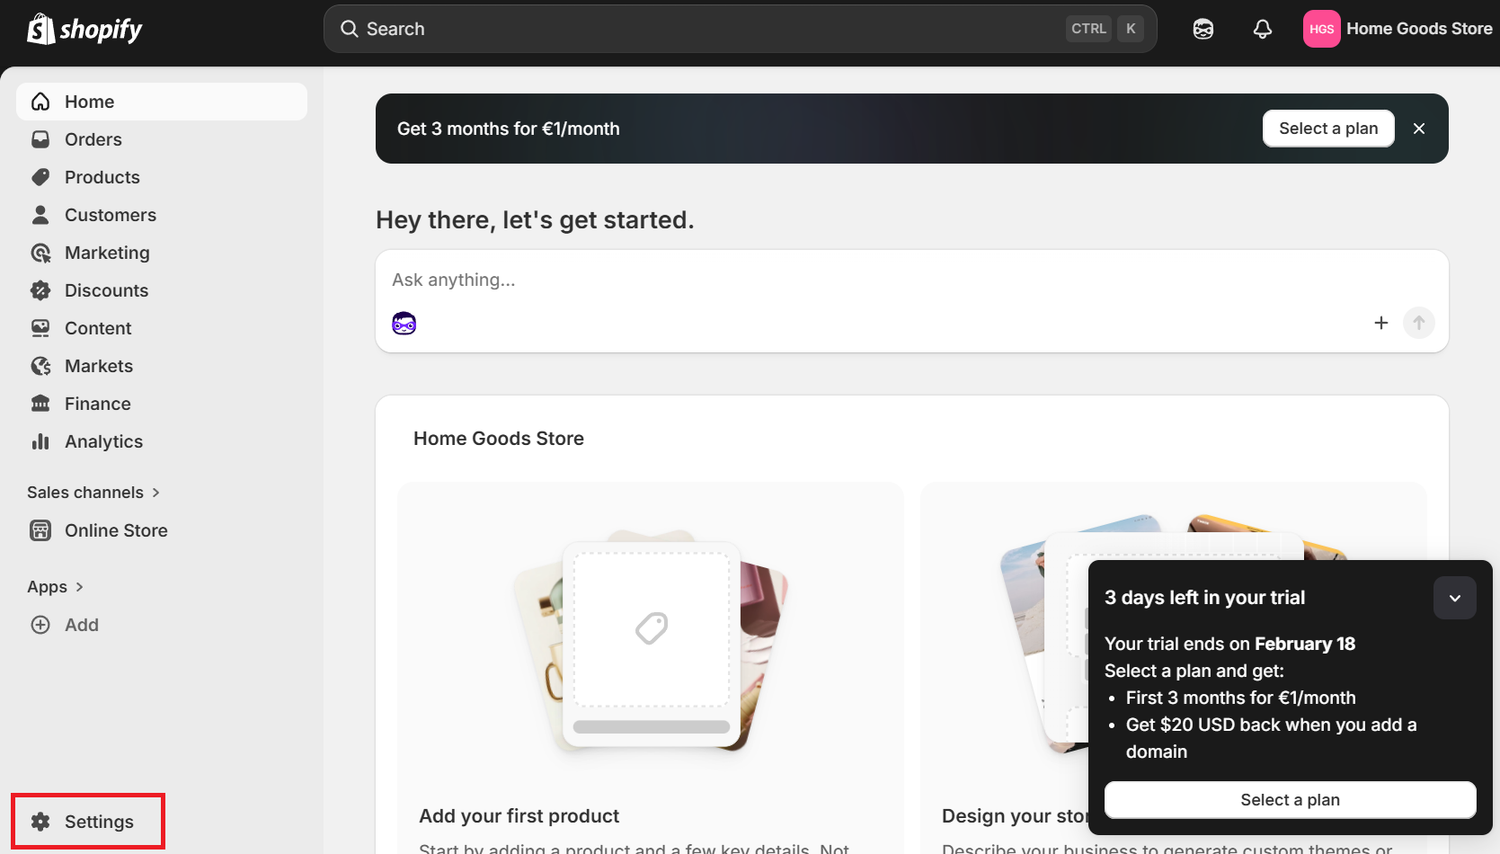
Step 5 — Choose Your Store Name and Basic Settings
Next, go to Settings → Store details and confirm:
- Store name
- Currency
- Country
- Contact email
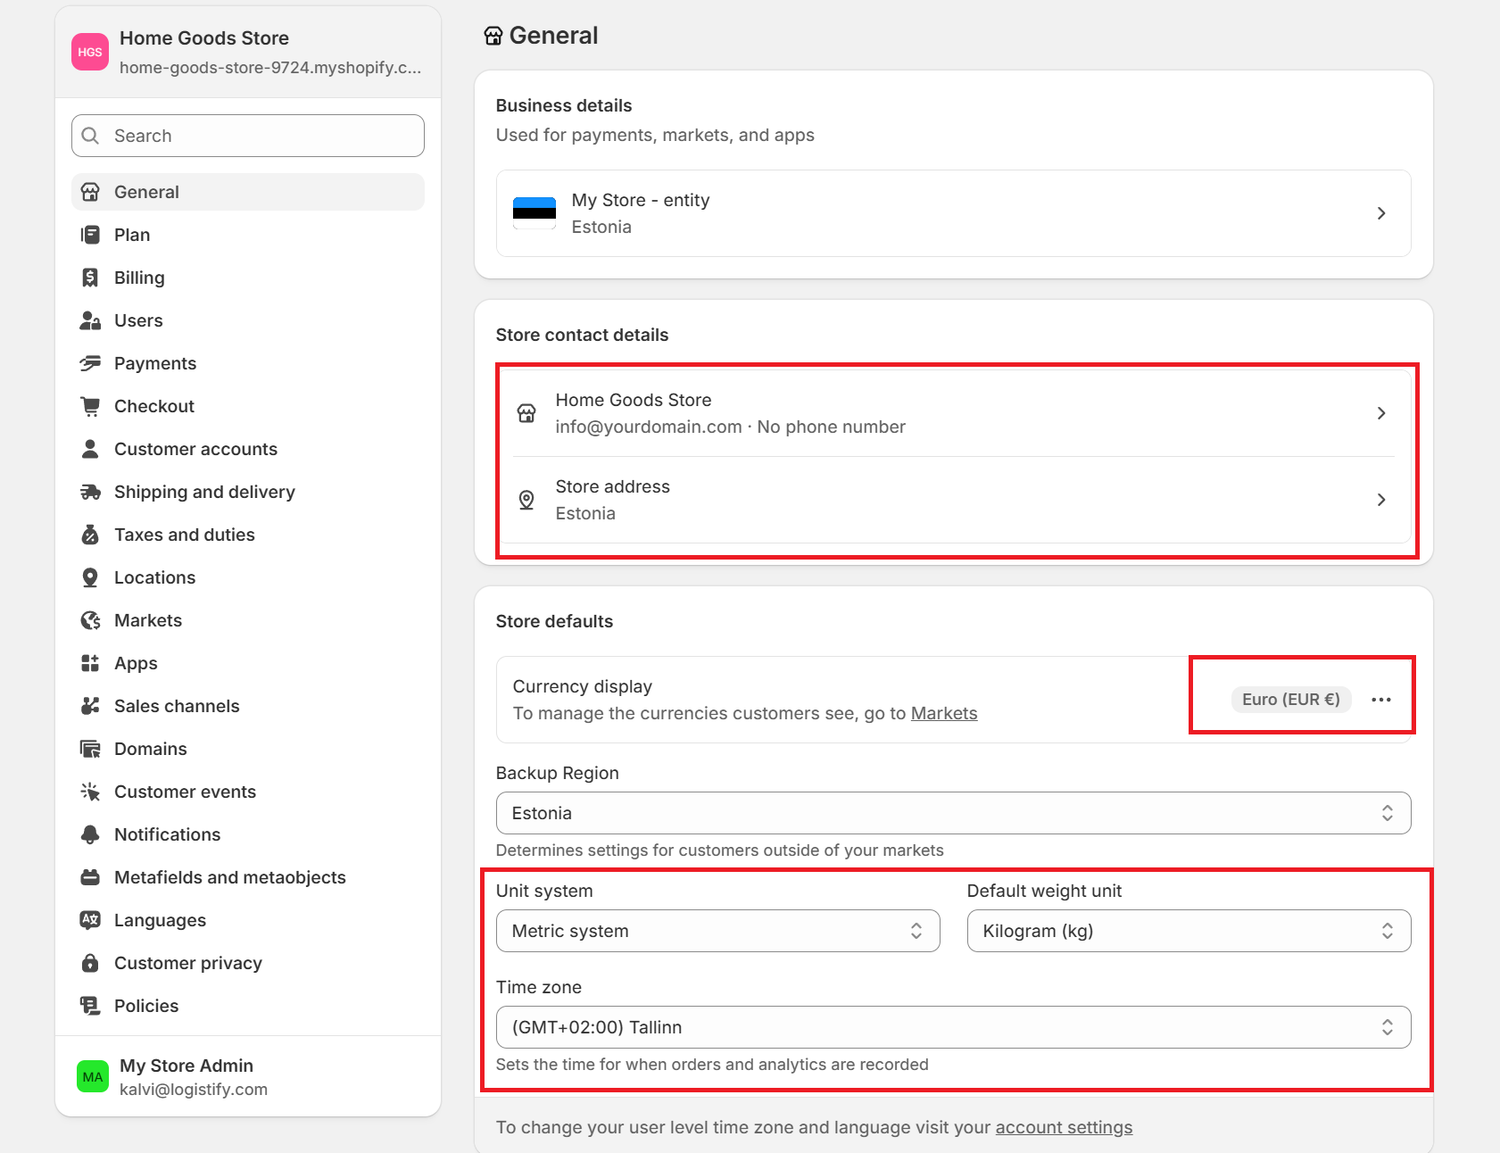
Why this step matters
These settings control payments, taxes, and checkout. Setting them correctly now prevents problems later.
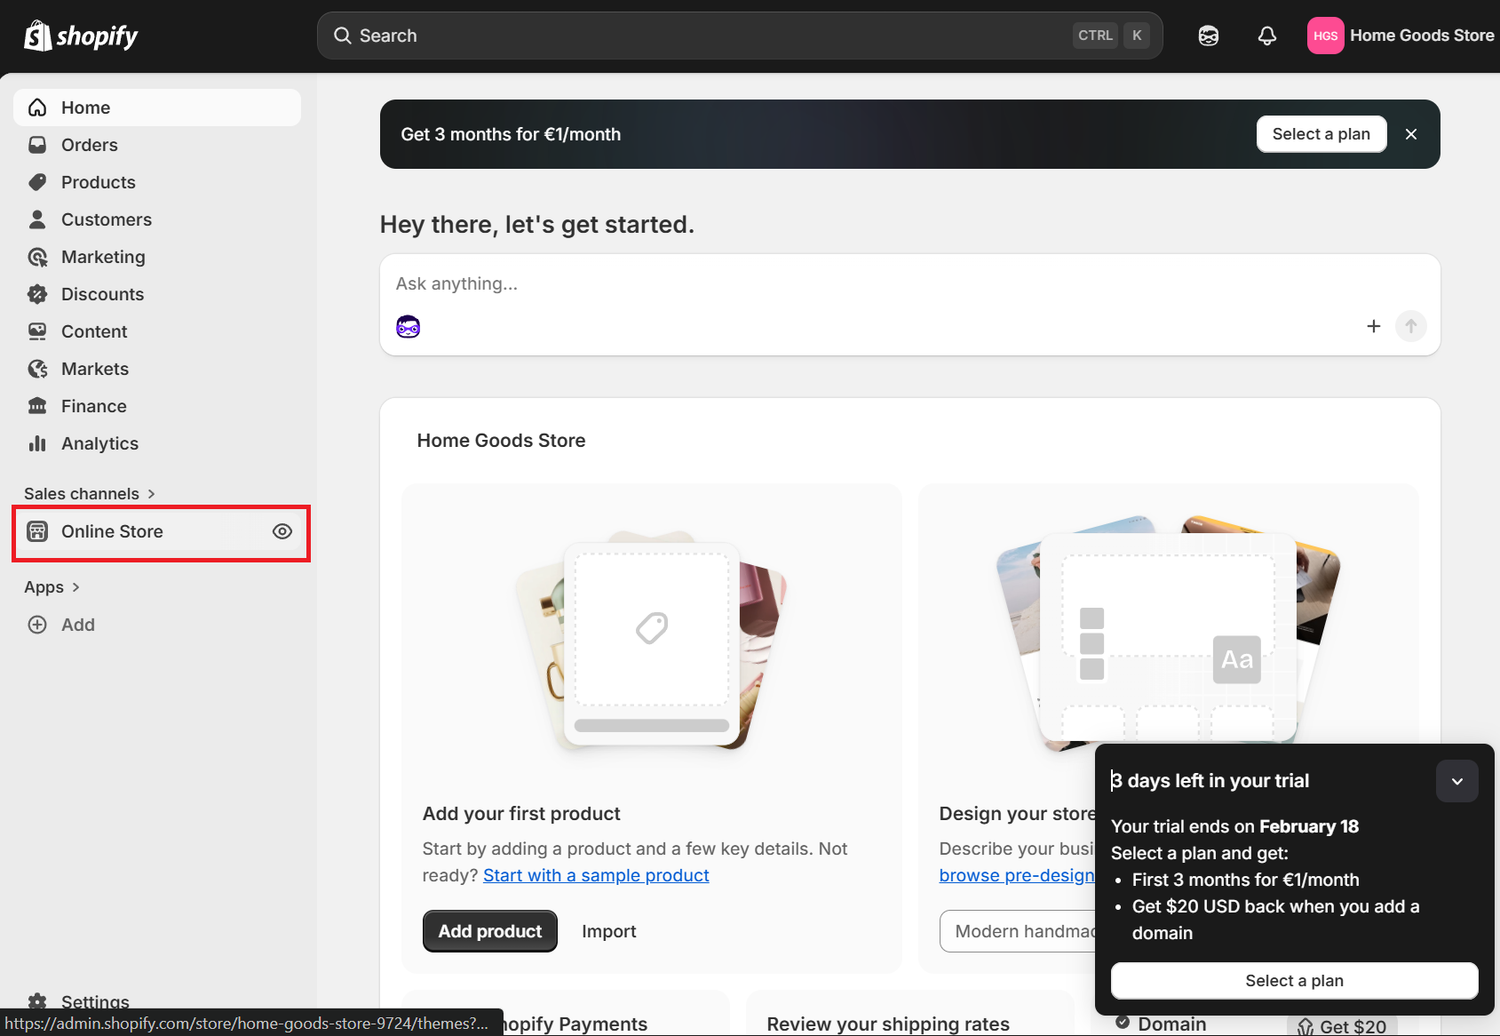
Step 6 — Pick a Design for Your Store
Now it’s time to make your store look professional.
Go back to "Home" (Dashboard) and click on the "Online Store" from the left menubar
Shopify provides free themes that already look clean and modern.
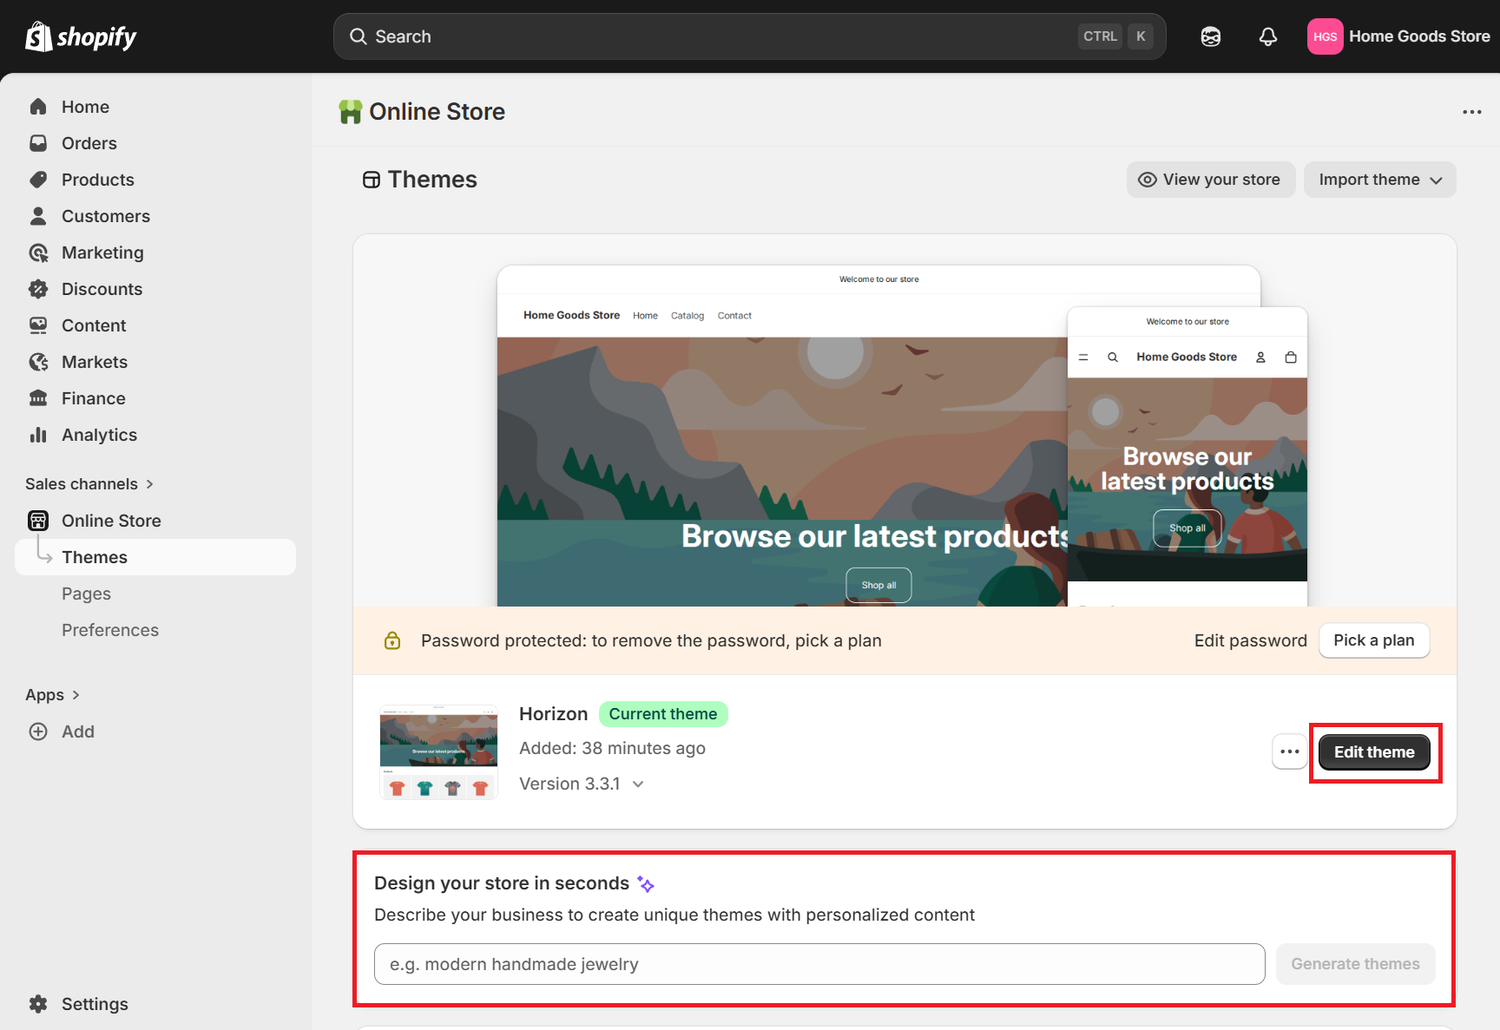
Choose one that fits your niche and click Edit Theme.
You can change:
- Colors
- Logo
- Homepage layout
- Fonts
- Product page design
You don’t need design skills everything is drag-and-drop.
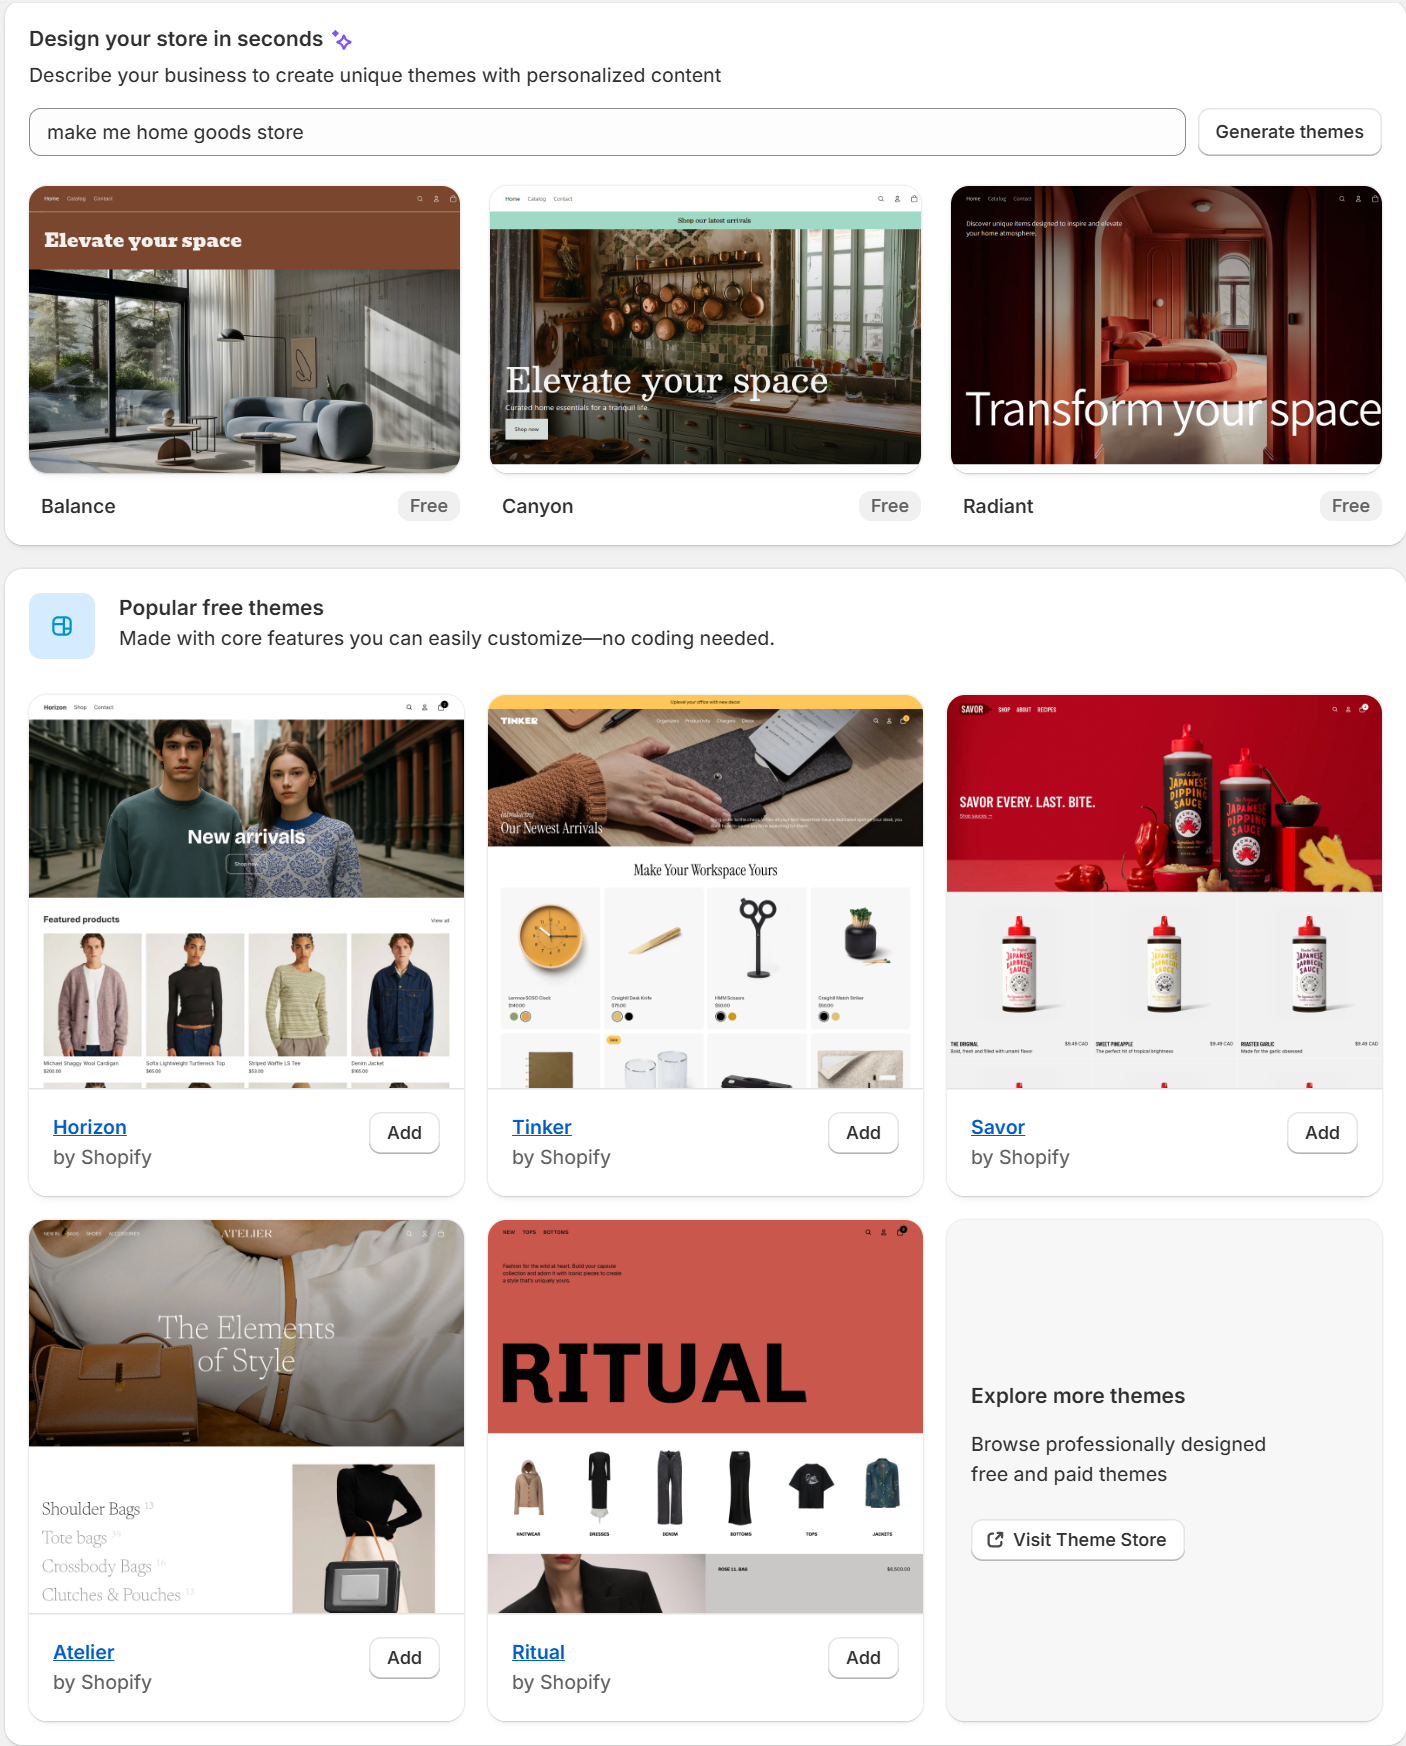
You can also let Shopify Design AI design the store on prompt you give.
Why this step matters:
People decide in seconds if they trust a store.
A clean design increases conversions and makes your store look legitimate.
Choose Your Store Theme
After setting up your store, Shopify will ask you to choose a theme. This is how your store will look to customers. You have several options:
- Start with the default Horizon theme
A clean, modern design ready to use.
You can customize it later with colors, fonts, and layouts. - Use Shopify AI to generate a theme for you
Shopify can automatically suggest a theme based on your store type and niche.
Great if you want a fast, professional look without design work. - Choose from 20 free Shopify themes
Browse 20 pre-designed templates and pick one you like.
Fully customizable, and all are optimized for mobile and desktop.
Why this matters:
Your theme affects first impressions and trust. A professional-looking store increases the chance visitors will buy. Beginners can safely use the default or AI-generated theme — you can always change it later.
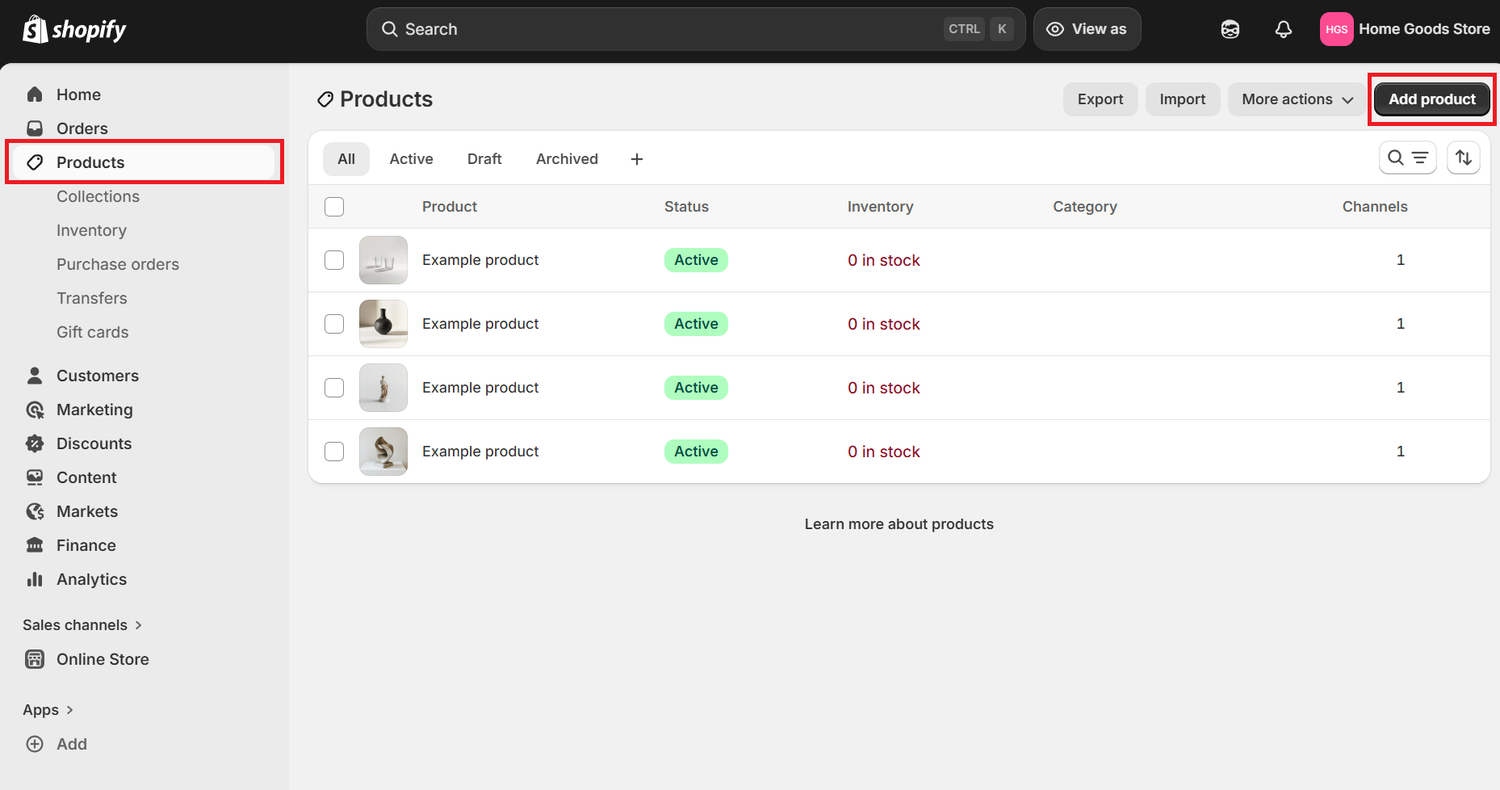
Step 7 — Add Your First Product
Next, add something to sell.
Go to: Products → Add product
Fill in:
- Product name
- Description
- Images
- Price
If you don’t have your own product yet, you can:
- Start with one test product
- Use dropshipping
- Sell digital products
- Sell services
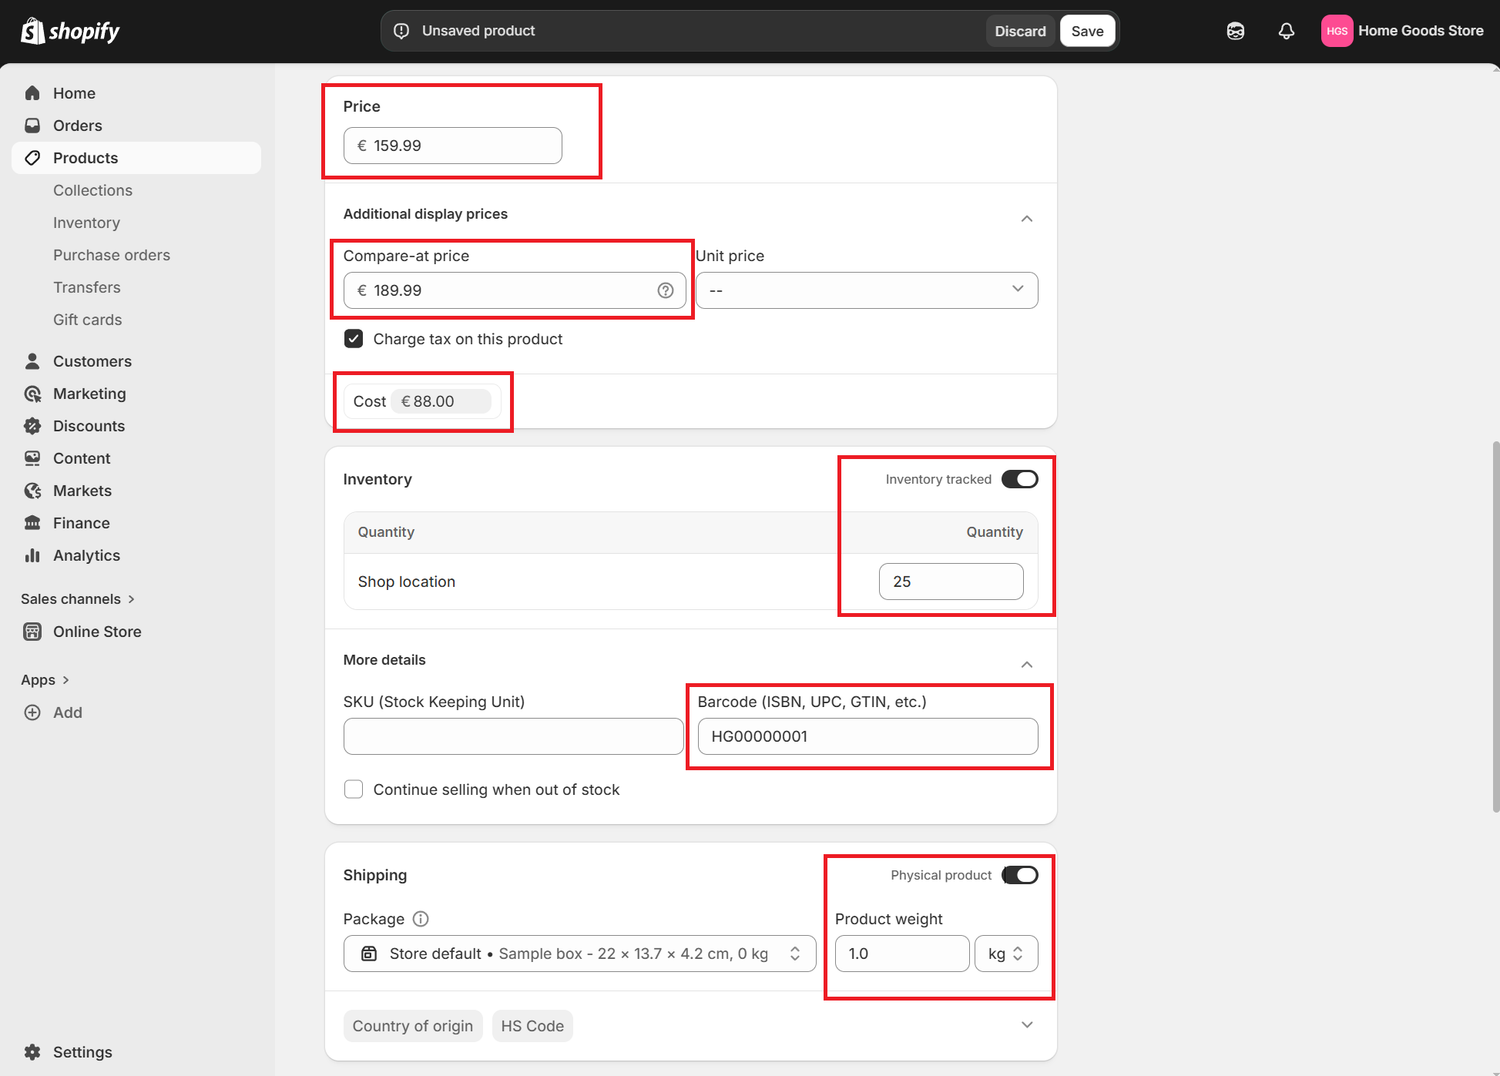
Shipping, Inventory, and Product Codes
When adding a physical product to your Shopify store, it’s not just the name, price, or images that matter. Properly filling in inventory and shipping information ensures smooth operations and avoids mistakes.
Key Fields to Fill Out:
- Price & Compare-at Price
Price is what customers pay.
Compare-at price shows the original price if you want to display a discount.
Helps increase perceived value and conversions. - Cost
Your internal cost per product (for profit calculation). - Inventory
Track inventory to avoid overselling.
Enter Quantity and set Inventory tracked on.
Always assign the Store location where stock is kept. - SKU (Stock Keeping Unit)
Unique identifier for your product.
Helps with internal tracking and order management. - Barcode (ISBN, UPC, GTIN, etc.)
Extremely important for shipping optimization and third-party fulfillment.
Ensures:
Correct product scanning in warehouses
Faster processing by carriers
Avoids shipping errors
Even if you handle shipping yourself, barcodes reduce mistakes and speed up packing. - Shipping Details
Select Physical product.
Enter package dimensions (length × width × height) and weight accurately.
These values are used to calculate shipping costs, carrier rates, and shipping labels. - Country of Origin & HS Code
Required for international shipping and customs.
Helps avoid delays and extra fees when sending products abroad.
Why this matters:
Correct inventory and shipping information ensures:
- Customers get the right product on time
- You pay accurate shipping costs
- Shopify and carriers can calculate rates correctly
- Your business looks professional and trustworthy
Tip: Always double-check weight, dimensions, SKU, and barcode before launching your store. These small details prevent big operational headaches later.
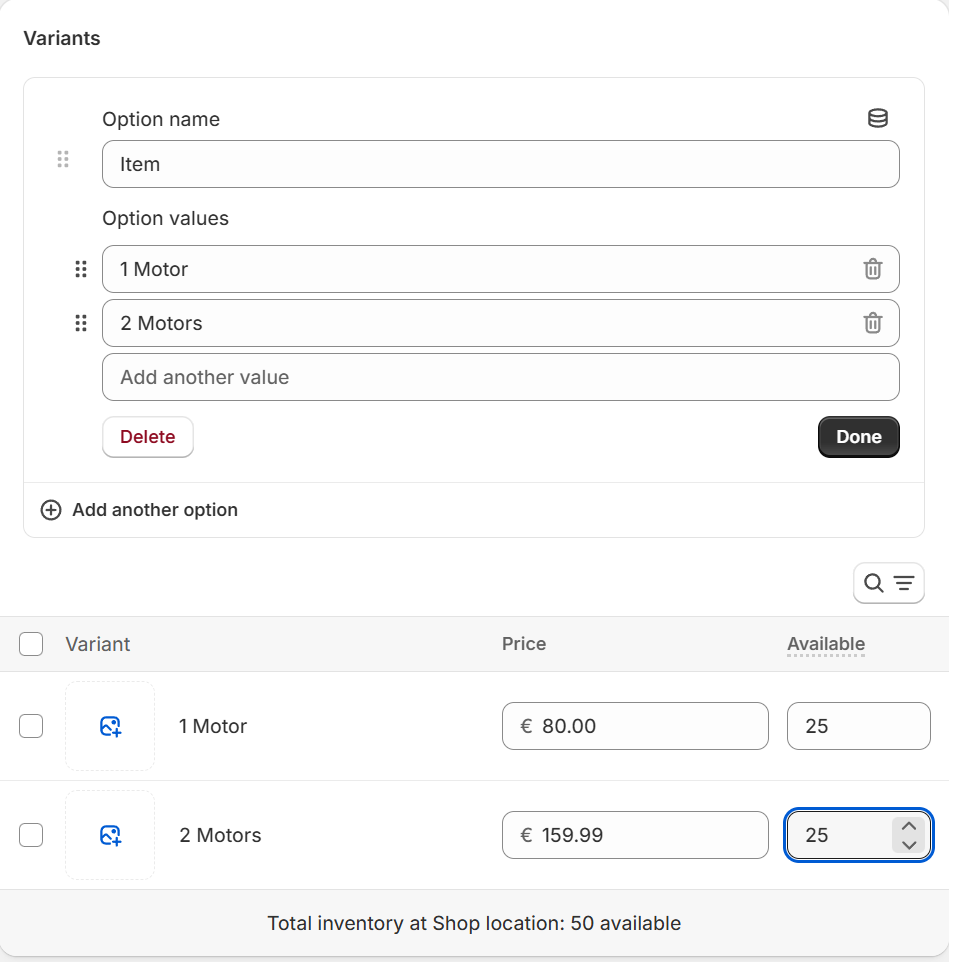
Adding Product Variants (Colors, Sizes, Quantities)
If your product comes in different colors, sizes, or quantities, you can add variants. This lets customers choose exactly what they want without creating separate products.
How to Add Variants:
- Go to the Variants section in your product page.
- Add options such as:
Color (Red, Blue, Black…)
Size (S, M, L, XL…)
Quantity packs (1-pack, 3-pack…) - Set individual prices, SKUs, barcodes, and inventory for each variant:
Each variant can have a unique price or cost
Track inventory per variant to avoid overselling
Assign a barcode for each variant if using fulfillment services
Why This Matters:
- Better customer experience: They can select exactly what they want in one product page.
- Inventory accuracy: Each variant can be tracked individually to prevent stock issues.
- Shipping efficiency: Accurate weights and barcodes per variant ensure correct shipping labels.
- Affiliate conversions: Customers are more likely to buy if they can choose their preferred color/size without confusion.
Tip: If you have many variants, Shopify allows you to bulk import SKUs, barcodes, and prices, saving time and reducing mistakes.
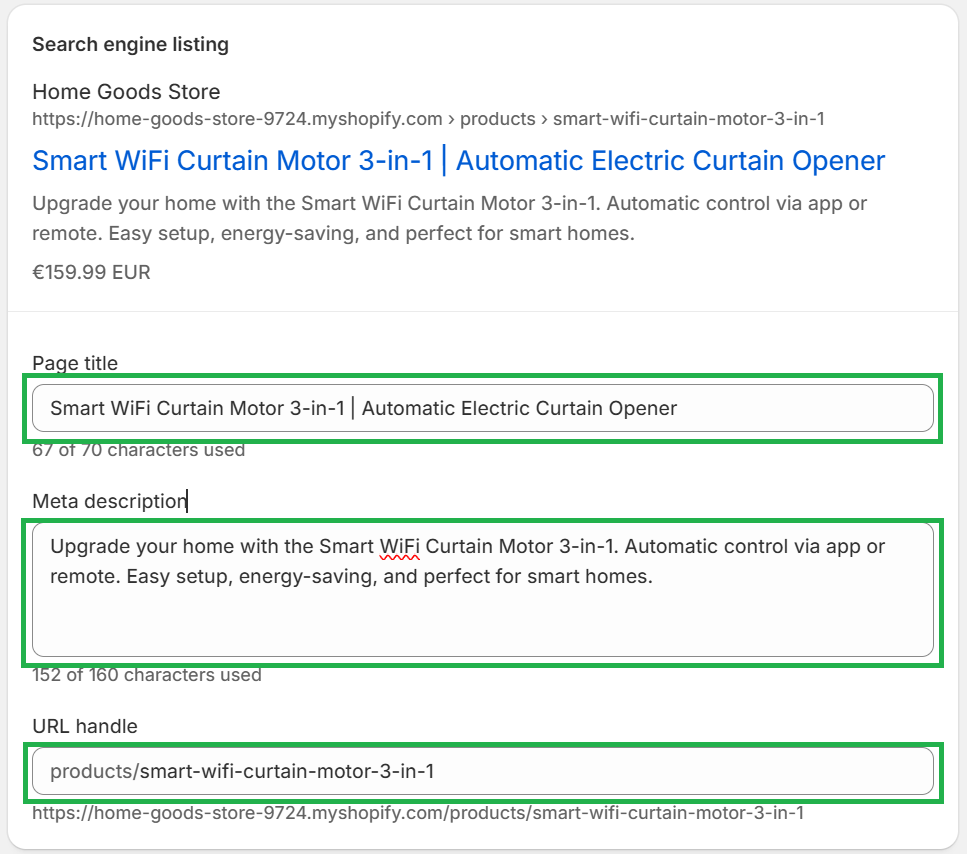
Search Engine Listing (SEO)
Shopify allows you to optimize how your product appears in Google and other search engines. This is called the Search Engine Listing Preview, and it has three main parts:
- Page Title
This is the clickable headline that shows up in search results.
Best practice: 50–60 characters, include main keywords.
Example:
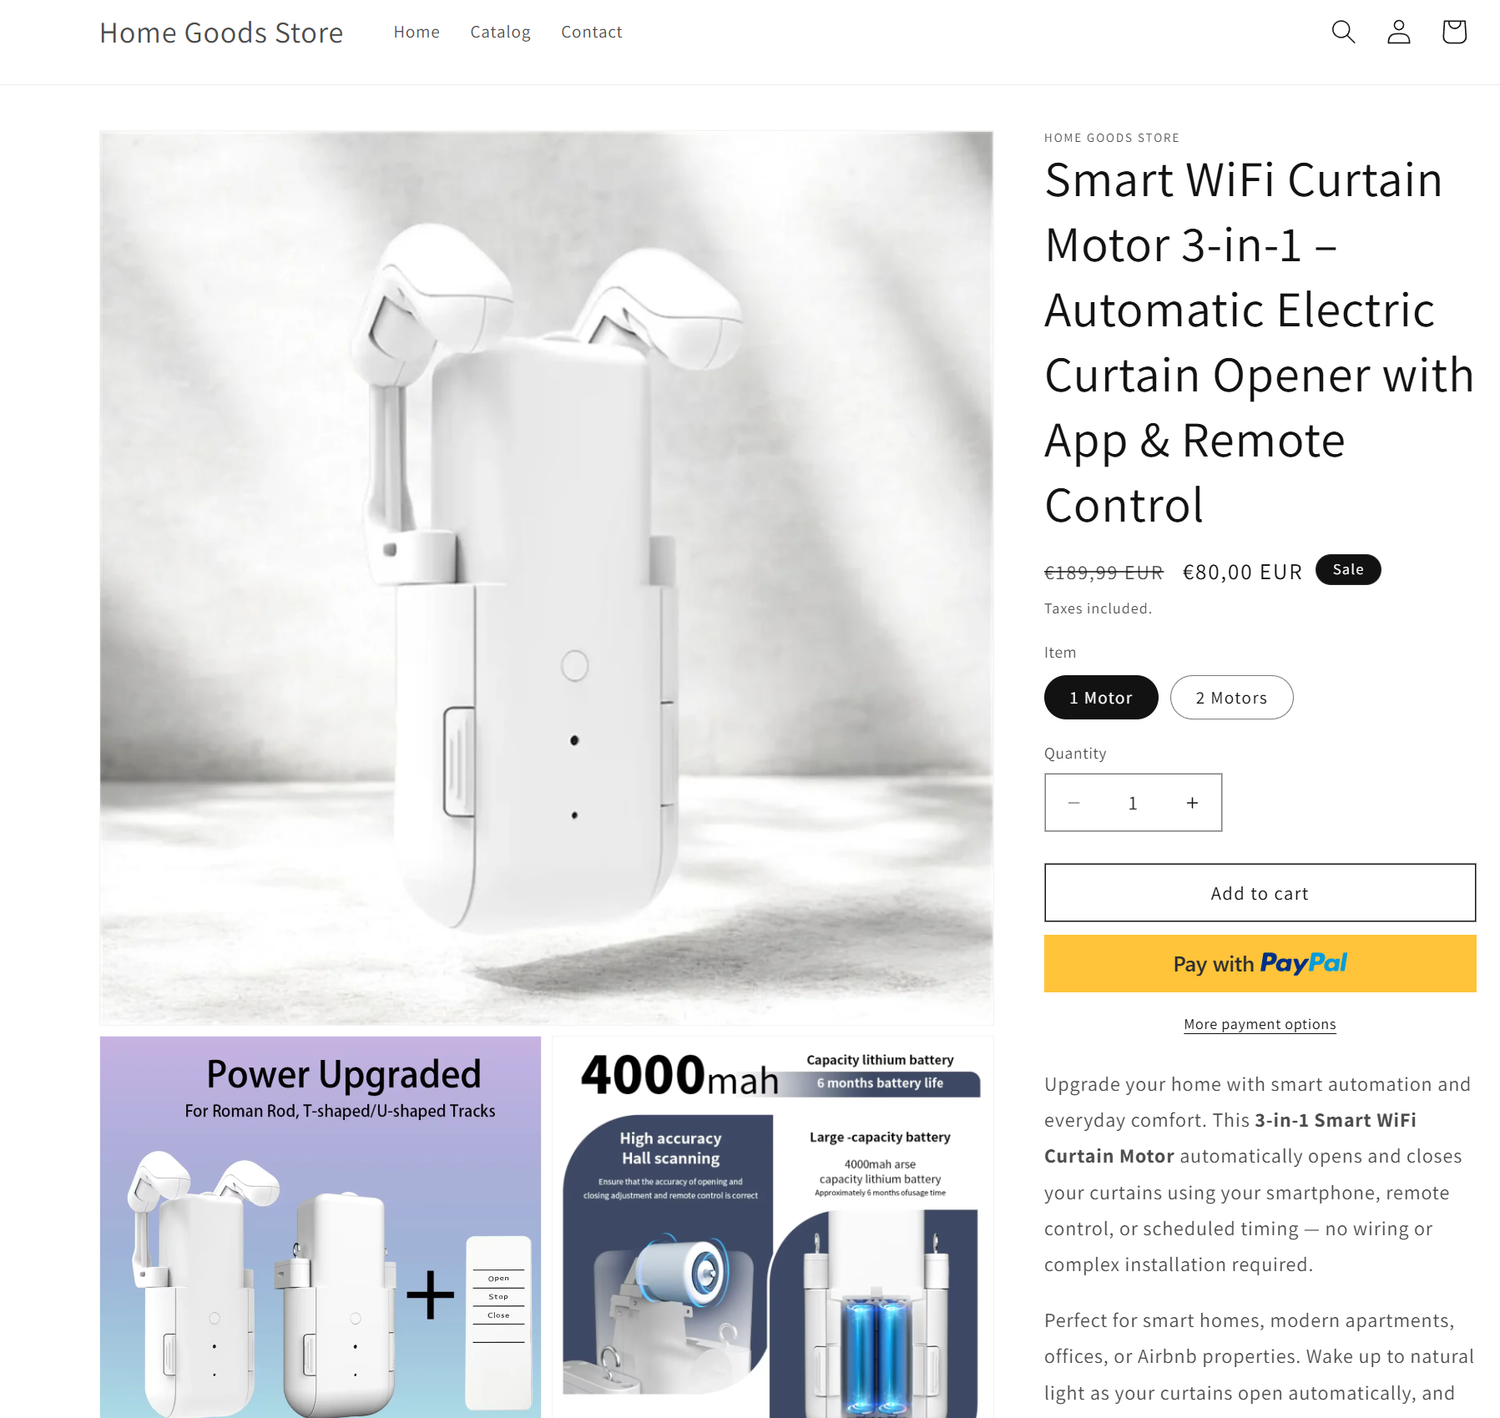
Smart WiFi Curtain Motor 3-in-1 | Automatic Electric Curtain Opener
Why: Clear, keyword-rich, and concise titles rank better and get more clicks. - Meta Description
This is the short text under the title in search results.
Best practice: 120–160 characters.
Should describe the product clearly and include main keywords and benefits.
Example:
Upgrade your home with the Smart WiFi Curtain Motor 3-in-1. Automatic control via app or remote. Easy setup, energy-saving, and perfect for smart homes.
Why: Helps searchers understand your product and improves click-through rates. - URL Handle
This is the SEO-friendly web address for the product.
Best practice: Short, lowercase, hyphen-separated, include main keywords. Avoid stop words like “and”, “with”, “for”.
Example:
smart-wifi-curtain-motor-3-in-1
Why: Clean URLs are easier to read, remember, and rank better in search engines.
Congratulations! your first product is ready!
SEO Best Practices for Shopify Products:
- Include main keywords in title, description, and URL.
- Keep title 50–60 characters.
- Keep meta description 120–160 characters.
- Avoid keyword stuffing — make it natural and readable.
- Use unique descriptions for each product, don’t just copy manufacturer text.
- Update SEO fields if your product or target keywords change.
Tip: After publishing, check Google Search Console to see how your page is indexed and adjust title/meta description for higher CTR.